It’s more fun to make web pages when we can show them off to our friends. There are a lot of ways to put our pages online, GitHub Pages is one way.
Goal
Follow along to see how we can host a website online. In this blog, we will be: making a GitHub repository, make and publish a website to our Github, and host it wih GitHub Pages. The steps we follow will reflect the daily workflow you might see when publishing on GitHub.
Setup
First, make sure to have a GitHub account set up. If you don’t you can sign up for a GitHub account here. The awesome thing about GitHub Pages is that you get one main site per account and as many project pages as you would like. That means that when you are ready to create a portfolio of all of your coding work, you can have a main page all about you and a page for each of your coding projects that you do! Also we are going to need Git. If you dont have Git, you can install Git here.
Project Structure
A quick note about structuring projects before we begin. When we start a new project, it is a good idea to create a folder to hold the HTML file and the css and img folders. You might have been using a descriptive name for your HTML file, such as favorite-things.html or my-first-webpage.html. Often, though, you’ll want to give the descriptive name for your folder, and name the web page’s main HTML file index.html. As we start to add pages to our web site, the index.html file will serve as the home page of your site. Also, if you don’t name your main HTML file index.html, GitHub Pages won’t recognize it as the main page.
Creating a GitHub repository
First, we need to create the repository on GitHub.

Once logged in, we’ll select the New Repository or New button to go to the Create a new repository screen:
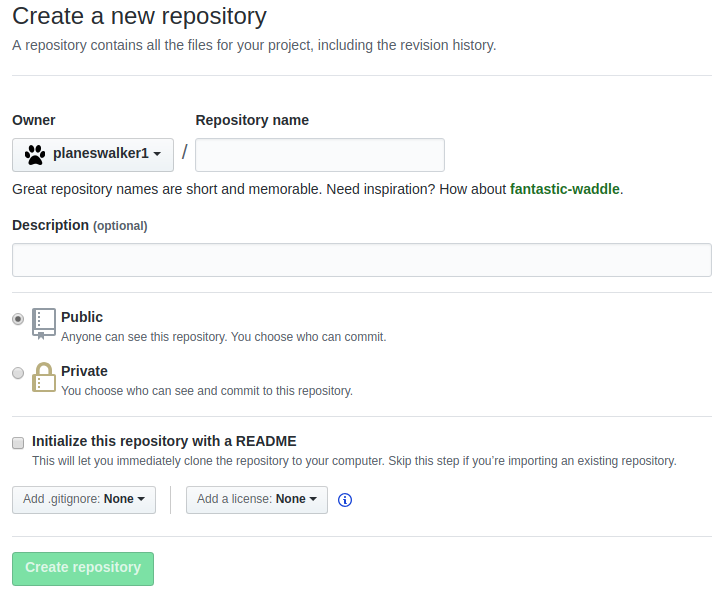
Let’s walk through the options we need to complete for our new repository.
First, we enter a repository name. For this project you can enter whatever you like. I’m going to name it ‘cool-website’. Though the description is optional, it can be helpful to our future selves and anyone else looking at our repository to see a quick description of its content.
Since I am using a free GitHub account, Public is the only option for my repositories. As it notes, everyone can see the contents of the repository but as the owner of it, I will be the only person who can determine what code can be committed to it.
The last option asks whether or not to initialize the repository with a README. A README file is a detailed description of the repository including information like authors, usage instructions and licensing. Let’s check it.
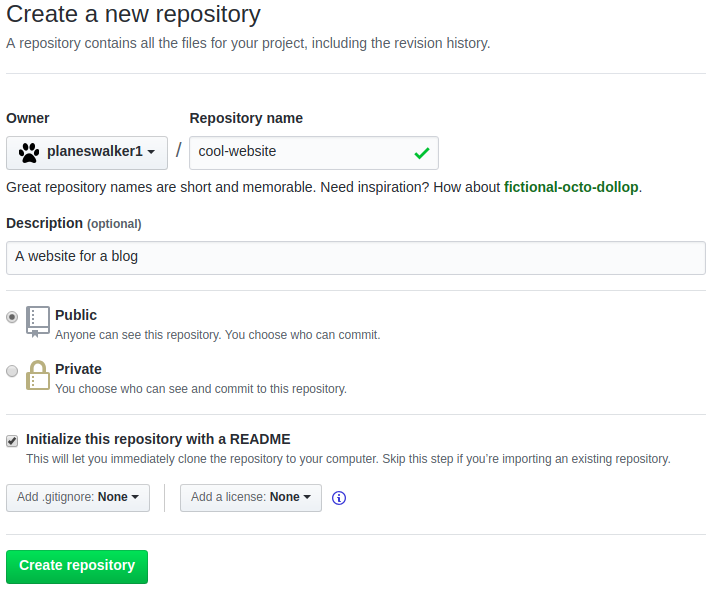
Cloning A GitHub Repository To Your Machine.
Go to your newly created repository page on your GitHub and click on the Clone or downloadbutton and then click on the clipboard to copy the location of the repository.
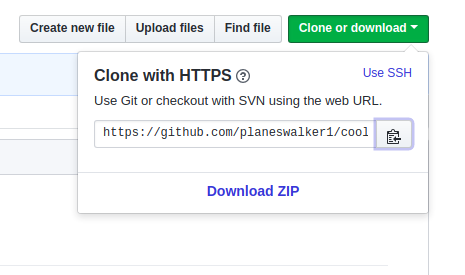
Open your terminal and use the cd command to change to the Desktop directory.
Then, run the git clone command with the link you copied earlier
$ git clone https://github.com/planeswalker1/cool-website.git
Note that your link will be different from my link. It is the location of your repository on GitHub
Adding HTML To The Cloned Repository
After you cloned your repository, cd into it and use the touch command to create an index.html file
$ cd cool-website
$ touch index.html
Then, open index.html with your text editor of choice, I like to use Visual Studio Code. You can download Visual Studio Code Here.
This command opens everything in the directory in Visual Studio Code
Lets add some starter html for this website. Feel free to add your own HTML.
<h1>Potatoes</h1>
<p>
  There are dozens of different potato varieties.
  They are usually described as early, second early and maincrop.
</p>
Tracking changes with git
We can use the git status command to check for any changes made to the repository
Let’s add, commit and push our changes to GitHub.
$ git add .
$ git commit -m "add HTML file with a description about potatoes"
$ git push
When you run the git push command, the terminal will prompt you with your GitHub login info. For security reasons, only the owner of the GitHub repository is able to push code to it. This means that we need to enter our login information to confirm our ownership. Once entered, the code is copied to the GitHub repository and we can see it online if we go to our GitHub repository.
Hosting with Github Pages
Now that we have our repository setup with an HTML page we can tell Github to host our site using GitHub Pages.
Go to your repository page, then click on the settings tab.

Then scroll down to GitHub Pages and on the source heading click on the drop down and select master branch and save.
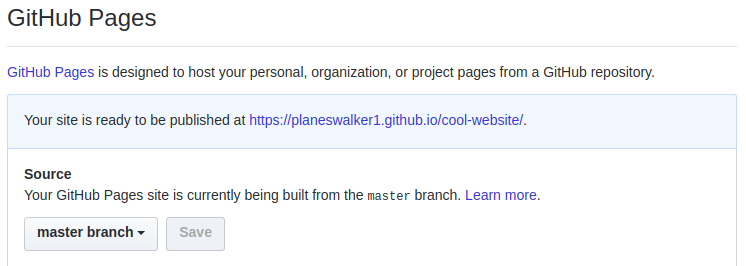
If everything is successful GitHub Will notify you with a link of the repository below the GitHub Pages tab.
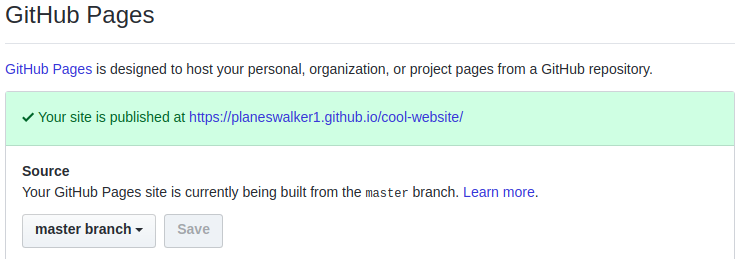
Congrats now you have your website on the internet for everyone to see. Great Job.
Updating GitHub Pages
Note that if you make further changes to your project, GitHub will automatically update the site with your changes.
Conclusion
GitHub Pages is a great way to host your website online for the world to see. Make sure that your main HTML file is called index.html because GitHub Pages won’t recognize it as the main page and your website will not be hosted.


